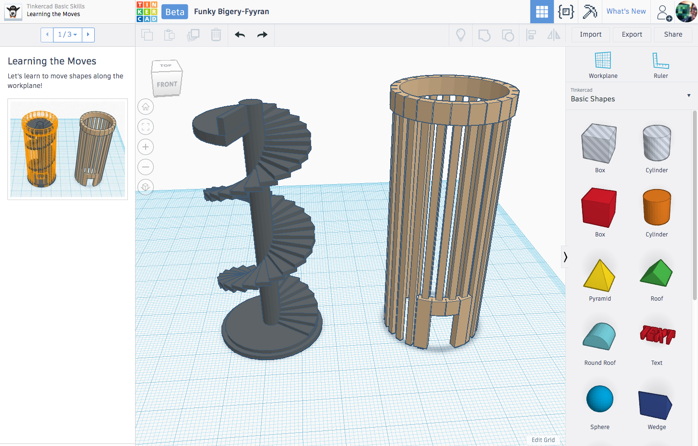

According to its website, “Tinkercad is a free online collection of software tools” for what is known as 3D CAD (three-dimensional computer aided design) as well as coding, circuitry, and 3D printing. With a variety of target audiences, including students, parents, and teachers, as well as hobbyists and general enthusiasts, Tinkercad provides users with web-based access from any on-line device, and their designs can be published and shared thanks to a Creative Commons license.
Tinkercad was launched in 2011 and is currently owned by American software giant, Autodesk. Its objective, according to founder Kai Backman, is to help “make 3-D design in general, and the design of physical items in particular, accessible to hundreds of millions of people.” By combining creative thinking and collaboration with computer aided design, Tinkercad introduces students to such pursuits as architecture, engineering, and even animation.
Tinkercad designs can also be taken further by integrating them with Merge Cube or CoSpaces. These integrations allow for models and designs to be viewed in AR and VR spaces. Link to Merge Cube website with instructions for importing Tinkercad designs into Object Viewers.
Click above to view an example of Tinkercad project in progress

3D design software provides another medium for your students to utilize their applied design thinking skills. The beauty of Tinkercad over other 3D design tools lies in its accessibility. Catered to the beginner designer, Tinkercad makes the design process user friendly by employing drag & drop mechanisms and snapping grids. The application is also free to use and browser-based, allowing any computer to run the application without downloads. (You can even use it on your tablet!)
Objects designed in Tinkercad can also be shared with other peers, and exported to be printed on a 3D printer!

-
- Visit http://tinkercad.com/
- Sign up for a free account
(please keep in mind that Tinkercad data is not Canadian housed so teachers may choose to sign up for themselves but would need to confirm permissions with their schools/district before asking students to sign up. Teachers can create classes, share designs and challenges with their students. If teachers add students using a nickname, students can login using a join code and there is no need for them to provide their email or other personal information!
- Begin either by Creating a New Design or visiting the Gallery to browse other designs
- Drag and drop shapes and objects from your tool bar onto your grid – by default, objects snap to sit on the ‘surface’ of the plane.
- Edit your shapes and objects by selecting on the transformative modifiers located around the object
- Rotate your viewing angle by clicking on the left side cube and moving it around.
- Share or Export your creation with the buttons located in the top-right corner
- To go further… After you design your project in Tinkercad, you can upload the object on Merge cube! It will give an opportunity to your students evaluate, improve, and play with their work in their own hands!
- Visit the Thingiverse https://www.thingiverse.com/ for a variety of templates, lessons for projects across the curriculum.
A few Tips:
- If you want to stack objects on top of each other, first place the object on the
 ‘plane/paper’ and then move it up using the triangle tool at the top.
 - You can view the height of each object by selecting the object.
 Use the Cube in the top left corner of your screen to view Front, Back, Top, Bottom… Be sure you are building ON the plane (not below it!)

If want a step-by-step of some of the Tinkercard tools, the Master of Educational Technology prepared a small demonstration of what you can do:


